Thinking about adding shade and style to your home but worried about the cost of professional installation? You’re in the right place. Installing a polycarbonate awning yourself is not only possible but can be a highly rewarding weekend project that saves you significant money. Polycarbonate, a tough and versatile plastic, is a fantastic material for awnings because it’s lightweight, impact-resistant, and diffuses sunlight beautifully, creating a soft, glare-free shaded area. This guide is designed specifically for beginners, breaking down the entire process into manageable steps. With some planning, the right tools, and a bit of elbow grease, you can transform your patio, deck, or doorway with a durable and attractive awning that will last for years.
Why Choose a Polycarbonate Awning?
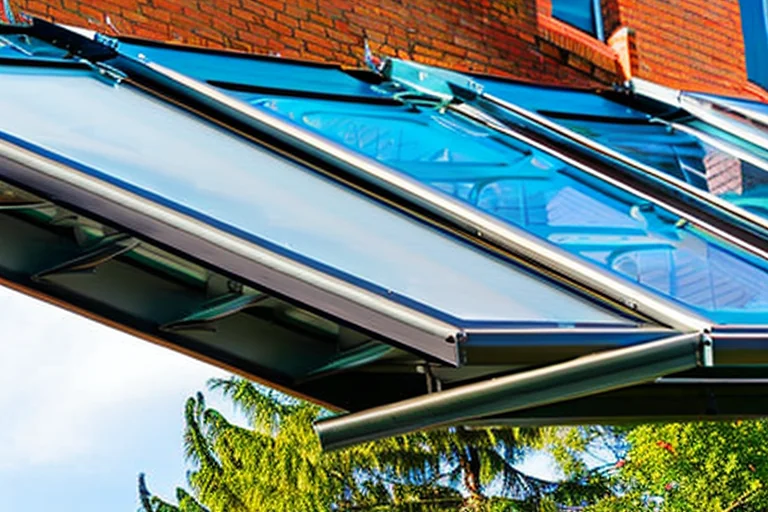
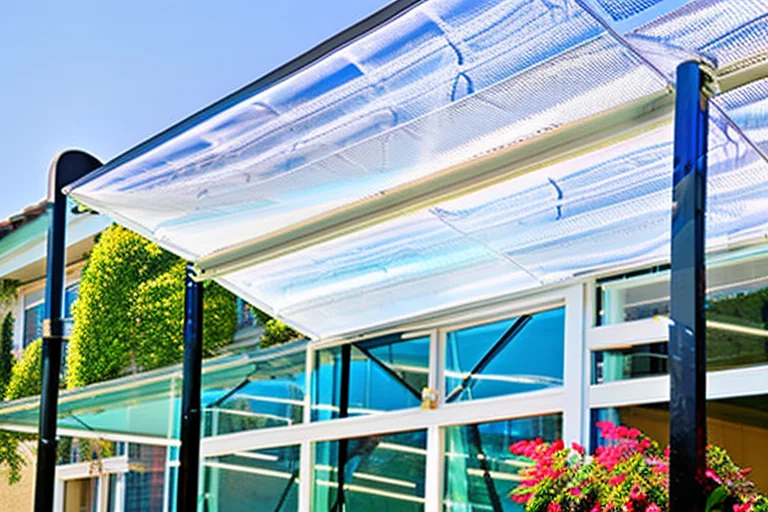
Before we dive into the nuts and bolts of installation, let’s talk about why polycarbonate is such a popular choice. Unlike glass, polycarbonate sheets are virtually unbreakable, making them a safe option for areas prone to hail or falling branches. They also weigh much less than glass, which simplifies the support structure and installation process. Polycarbonate panels are typically available in multi-wall or twin-wall designs, which are hollow. This structure provides excellent thermal insulation, keeping the area underneath cooler, and adds rigidity without extra weight. Furthermore, many polycarbonate sheets come with a UV-protective coating on one side, which prevents yellowing and degradation from the sun, ensuring your awning stays clear and attractive. When paired with a sturdy aluminum frame, you get a low-maintenance, rust-proof system that stands up to the elements season after season.
Planning and Preparation: The Key to Success
Rushing into the installation is the most common mistake DIYers make. Proper planning will save you hours of frustration and ensure a professional-looking result. Start by deciding on the exact location for your awning. Common spots include over a back patio, a sliding glass door, or a window. Consider the sun’s path throughout the day to maximize shade coverage. Next, you must take precise measurements. You’ll need the width of the area you want to cover and the desired projection (how far out from the wall the awning will extend). Remember to account for the pitch or slope of the awning, which is necessary for water runoff; a minimum slope of 1 inch per foot is standard.
Check your local building codes! Some municipalities require permits for awnings, especially if they are considered a permanent structure or extend beyond a certain distance. It’s also crucial to identify what you’ll be mounting the awning to. The ideal scenario is anchoring into the home’s wall studs or a solid header above a door or window. If you’re attaching to siding or brick, you’ll need specific fasteners and techniques to ensure a secure hold. For many homes, a great solution is to utilize a robust aluminum gutter awning system that offers a clean, integrated look and strong mounting points.
Gathering Your Tools and Materials
Having everything you need before you start is non-negotiable. Here’s a basic checklist. For tools, you’ll need: a reliable drill/driver with assorted bits, a level (a 4-foot level is ideal), a tape measure, a pencil, a caulking gun, a hacksaw or miter saw for cutting aluminum, and safety gear like gloves and goggles. Your materials list will be based on your kit or design, but generally includes: the polycarbonate panels, aluminum support frames (rafters and ledgers), mounting brackets, corrosion-resistant screws (often provided), silicone sealant designed for polycarbonate, and closure strips or end caps for the panels. It’s wise to lay out all the parts from your kit and familiarize yourself with them before beginning.
Step-by-Step Installation Process
Now for the main event. Follow these steps in order for a smooth installation. First, prepare the mounting surface. Mark your drill points on the wall using your level to ensure your ledger board (the horizontal piece that attaches to the wall) will be perfectly straight. Drill pilot holes into the wall studs. If you hit brick or masonry, use a masonry bit and appropriate anchors. Apply a bead of silicone sealant along the back of the ledger board before securing it to the wall with screws. This creates a waterproof barrier.
Next, attach the rafters (the arms that extend outward) to the ledger board according to your kit’s instructions. These usually bolt on at specific intervals. Once the rafters are secure, you can install the front bar that connects their ends. Now, it’s time for the polycarbonate panels. Important: ensure the UV-protected side is facing outward. Place the first panel onto the frame, leaving a small expansion gap as recommended by the manufacturer. Use the provided screws with rubber washers to secure the panels. Do not overtighten, as polycarbonate expands and contracts with temperature changes. Continue this process for all panels.
Finishing Touches and Maintenance
With the panels secured, add the finishing details. Install the closure strips on the ends of the panels to keep bugs and debris out of the hollow channels. Attach any end caps to the aluminum frame for a polished look. Finally, run a final bead of clear polycarbonate-safe silicone sealant along the top edge where the panels meet the wall to guarantee a watertight seal. For maintenance, your DIY awning is wonderfully easy to care for. Simply rinse it down with a garden hose a couple of times a year to remove dust and pollen. For tougher grime, use mild soap and water with a soft cloth or sponge. Avoid abrasive cleaners or brushes that could scratch the surface. Periodically check the tightness of screws and the condition of the sealant, especially before winter.
Creative Applications and Final Thoughts
Your new polycarbonate awning is more than just a shade provider. It can define an outdoor living room, protect your patio furniture from sun damage, reduce glare inside your home, and even help lower cooling costs by blocking direct sunlight. You’ve not only added functional value to your property but also accomplished a tangible home improvement project. The skills you’ve learned—precise measuring, secure mounting, and careful material handling—are transferable to many other DIY endeavors. Remember, the secret to a professional-grade DIY project lies in patience, preparation, and using quality materials designed for the job.
Ready to get started on transforming your outdoor space? You now have the knowledge to tackle this project with confidence. For the next step, browse our complete polycarbonate awning collection to find the perfect kit for your home. If you have specific questions or want professional advice on your plan, don’t hesitate to contact our awning experts today for personalized guidance. Let’s build your perfect shade solution together.